So, today I decided to make a start on the 3D printer project. I’ve got 15 parts now, enough to get started and also to get to a point where I can have something that moves I hope (I have a plug and circuit board in these issues). The first 12 issues cover “stage 1” and that’s what I hoped to be covering in this first guide.
I had the mantra “read everything carefully before starting” ingrained as a child so I have a Pavlovian response when opening a kit to read the instructions. In this case the instructions are spread across several magazines and the logical thing to do was to put them all in the binder first. The binder takes 15 issues and looks like this:
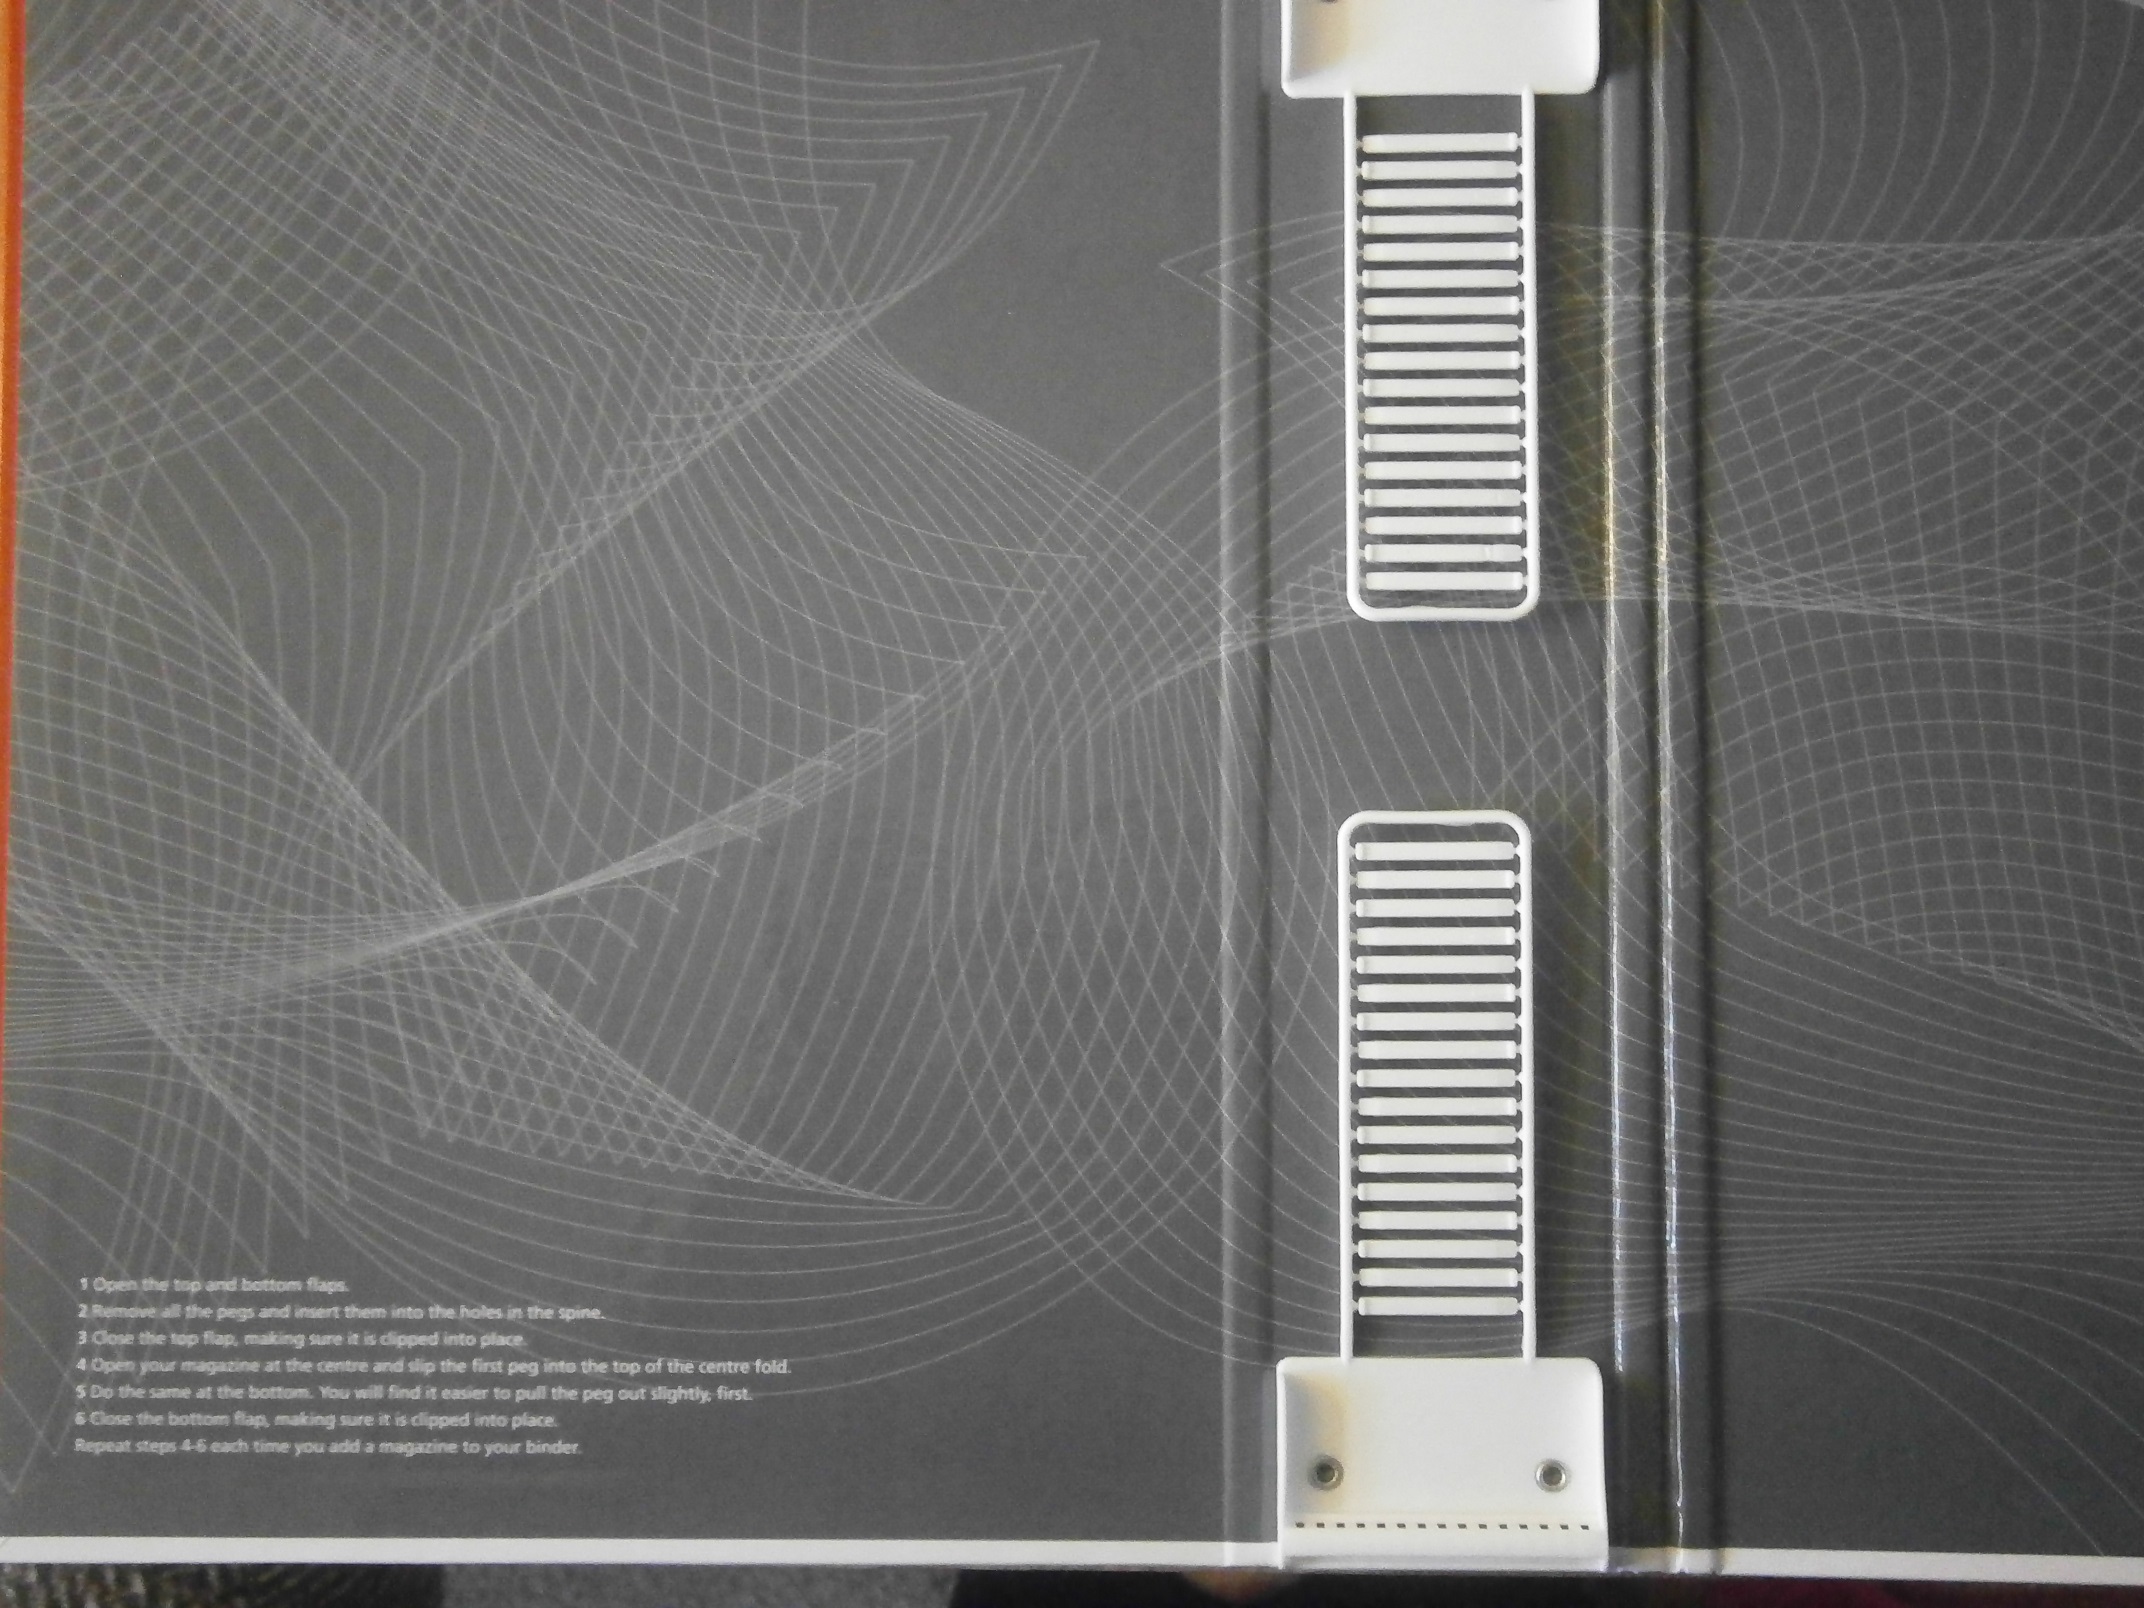
This instructions say:
- Open the top and bottom flaps
- Remove all pegs and insert into the holes in the spine
- Close the top flap clipping into place
- Open the magazine in the centre and slip the first peg into the top of the centre fold
- Do the same at the bottom, pulling the peg out slightly first
- Close the bottom flap, clipping into place.
Then repeat steps 4-6 each time you add a magazine.
Simple you may think… However, there is no “flap” to open, the plastic at the top and bottom is a solid piece. If you’ve not seen this type of binder before then you may get frustrated and it all end up in the bin 😉
What you need to do is relatively simple. Start at step 2, remove all the pegs – there are more than you will need (17 at the top and bottom and only 15 binding points) so don’t worry if you break any or (as in my case) your cat decides that one is “his”…
Get your first magazine and open at the centre (pages 12-13). Lie it in the centre of the binder aligned with the first hole. Insert the peg, point first, from the top of the binder so the pointed end sits against the centre crease. Unless you’ve filed down the pegs, there can be sharp bits of plastic on the edges you push against – a teaspoon is helpful here to avoid bleeding over your new magazines.
Repeat at the bottom, making sure not to damage the pages. The 1.5 cm overlap top and bottom is enough to hold the magazine in place, especially with all 15 issues bound and I’d suggest binding all 15 in one go and then you don’t have to worry about finding somewhere safe for the pegs. It’s also more efficient as you’ll get into the rhythm of alternating inserting the pegs.
Given that the binding instructions have very little relevance to what you need to do then this doesn’t bode well for the rest of the construction!
I am now reading all the instructions very carefully… 🙂