While it’s no secret I love Lego and tech in general, I also love the educational STEM toys that are released. Sometimes, the ages on the toys don’t always make sense for their complexity, leaving a child who is either frustrated at something too tricky or too simplistic. Both can leave a young person slightly disengaged with STEM, the exact opposite of the idea of these toys!
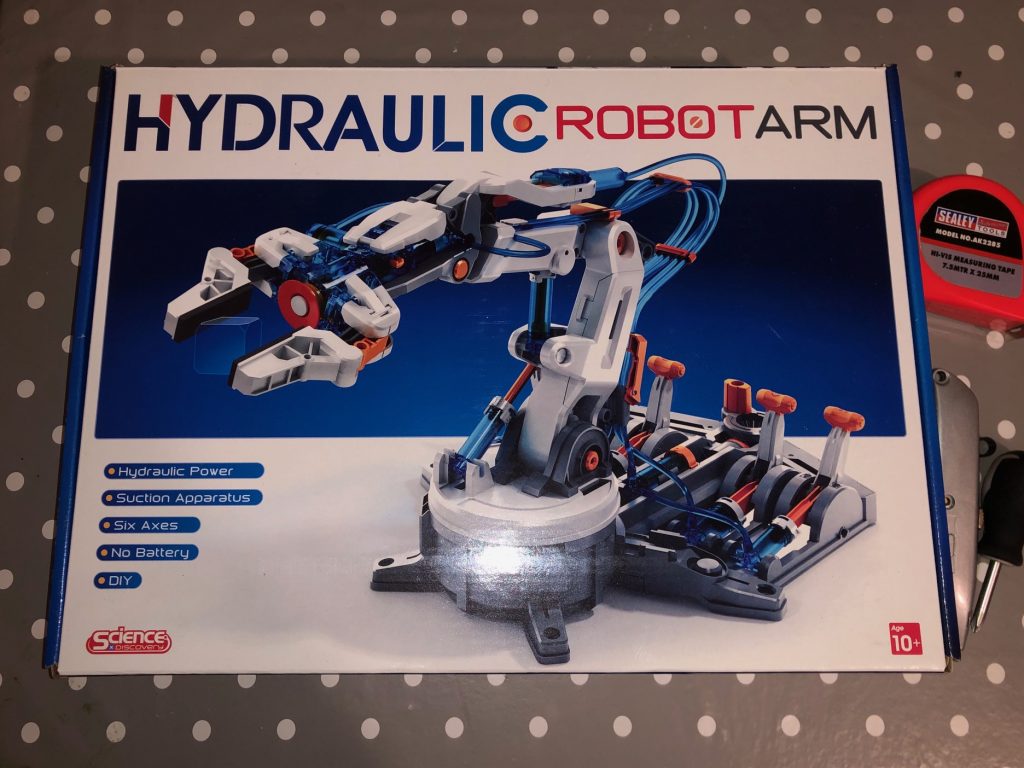
Christmas 2019 I was given this Hydraulic Robot Arm kit, suitable for ages 10+1. With work, OU study and general life I’ve only just got around to building it2. So, let’s take a look – is it suitable for ages 10 and up for both build and principles it teaches?
Contents
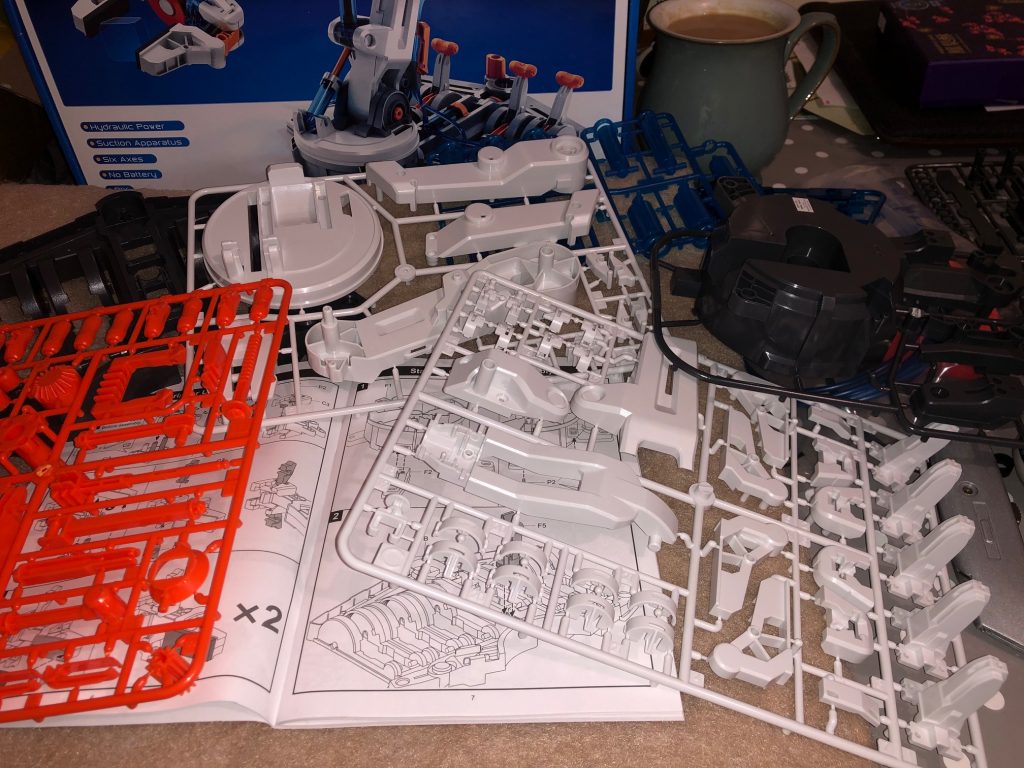
My daughter is eight and, while she’s happy enough building Lego, this kit is not aimed for her so I decided to build it alone. Opening the box there is a lot inside, including an 88 page assembly manual. Immediately this says to me that you’d need a 10 year old with patience. It also needs a cutter to separate the parts from the mouldings, so your child will need to be comfortable using those (I used a craft knife, which also needed a mat to protect the table, which you’ll see in some of the pictures). You also need a small cross point screwdriver and a tape measure (or ruler, but since you have to measure 56cm at one point a tape measure is a better option!).
While it may be tempting to separate all the parts first do not do this. The instructions also warn this. The parts are mostly labelled on the moulding, not on the parts themselves, and there are many similar but not identical parts in this build. There are also no spares and the parts are not used in numerical order. This means that any child will need to be good at reading and following instructions to get a successful build! You also need to remove any burrs (or moulding flash) from the parts as this can prevent them fitting together.
Initial assembly
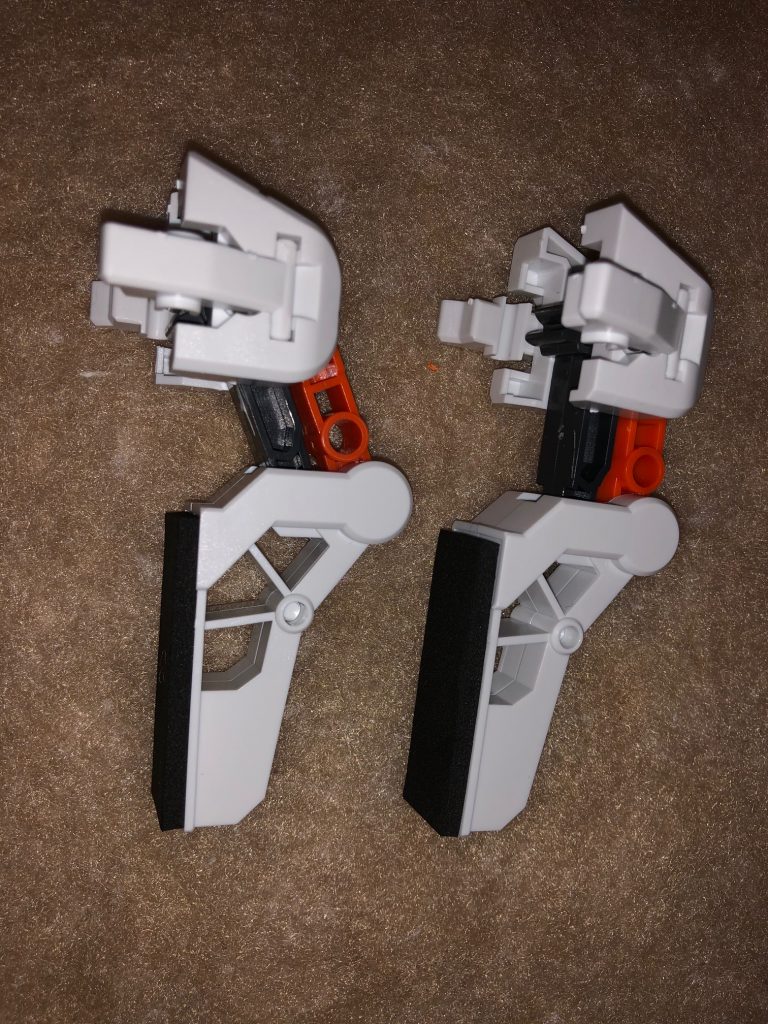
The first parts you build are the grips. These are two identical pieces but they are made up of subsections that are not symmetrical. The parts are straight forward to put together, with nothing particularly fiddly, and the images are pretty clear. They are then not used until the very end of the build! Pop them back in the box so they don’t get lost or covered in the oil or water that is used in later steps.
Next up is the stand and control base. This is the first point at which the screwdriver is needed. I found a precision crosspoint (0pt) screwdriver was needed for this, so it might not be something every house has (unless you have to repair glasses frequently for example 😉 ). This is also the first point at which things can go wrong. At this stage you get the gears that provide the rotation of the arm – the only part of the moment not controlled by hydraulics. As you put this together, test the movement of this gearing regularly. By the time you get to the end, the mechanism, (controlled by the orange tab in the image) should move easily but not loosely. This is something that I can image a younger child skipping over, so already I’m feeling that age 10 might be too young for the build part.
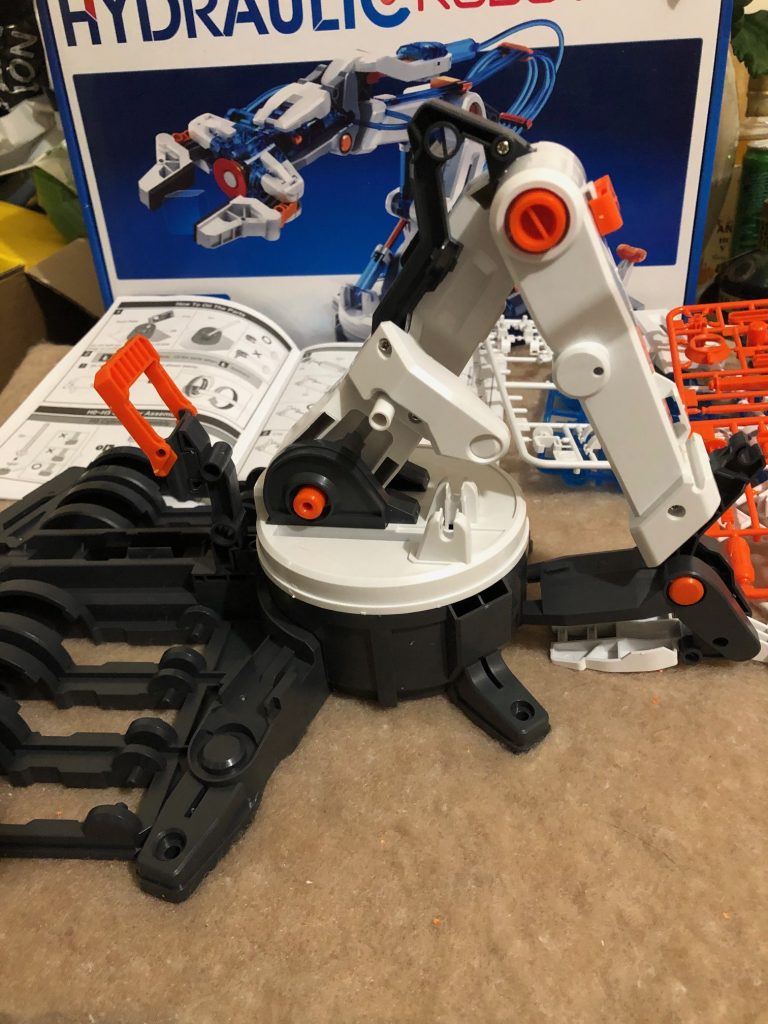
These two parts didn’t take that long and we’re already onto the main body assembly: the wrist, forearm and arm of the robot with the connector to the gear assembly. A lot of parts are involved in this assembly and while the instructions are clear, a lot happens in each step. Given how much the structure is rotated and the asymmetrical parts, it is very easy at this point to go wrong if you are not paying attention, fitting the wrong parts in the wrong places. The further you go with this assembly, the harder it will be to fix mistakes. Again, this makes me feel that this build is more suited to an older child (maybe 14+) as it requires a lot of focus. The final step here connects the arm to the gears in the base. The instructions do not suggest testing, but this really needs checking that the arm can rotate freely when the orange tab is rotated.
Hydraulic system
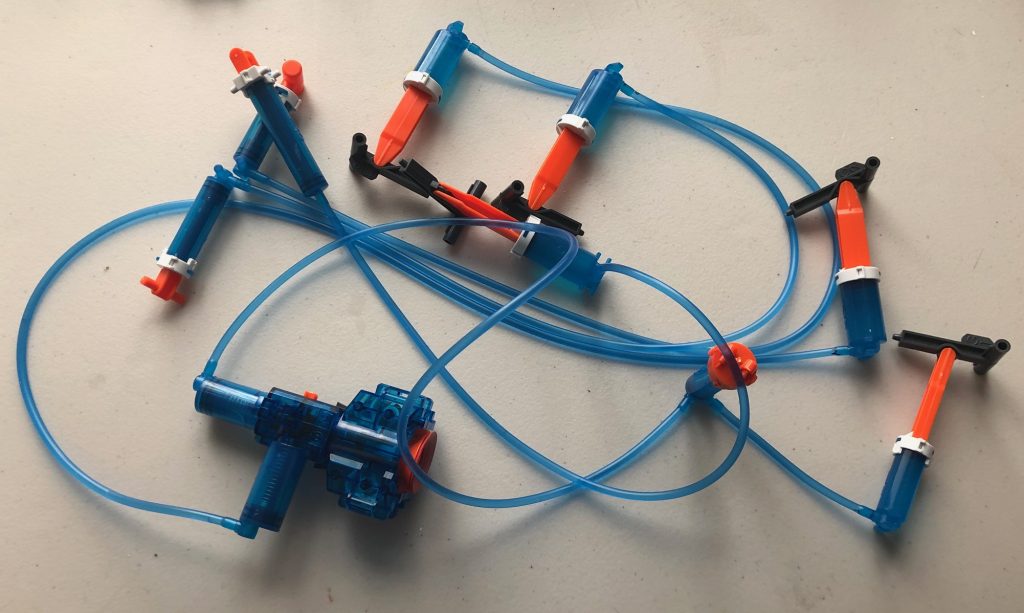
At this point, we’re 20 pages into the assembly instructions and the arm is looking “only” a few tubes short of the final picture. That is optimistic given the many pages yet to go through. We now start putting the hydraulic system together. The kit proves oil for the cylinders and an applicator and container to make this easy. I’d suggest not doing this step until you can build all the cylinders. You also need to ensure that the oil does not come into contact with the blue tubing so this needs to be thrown away when you’re done rather than going back in the box.
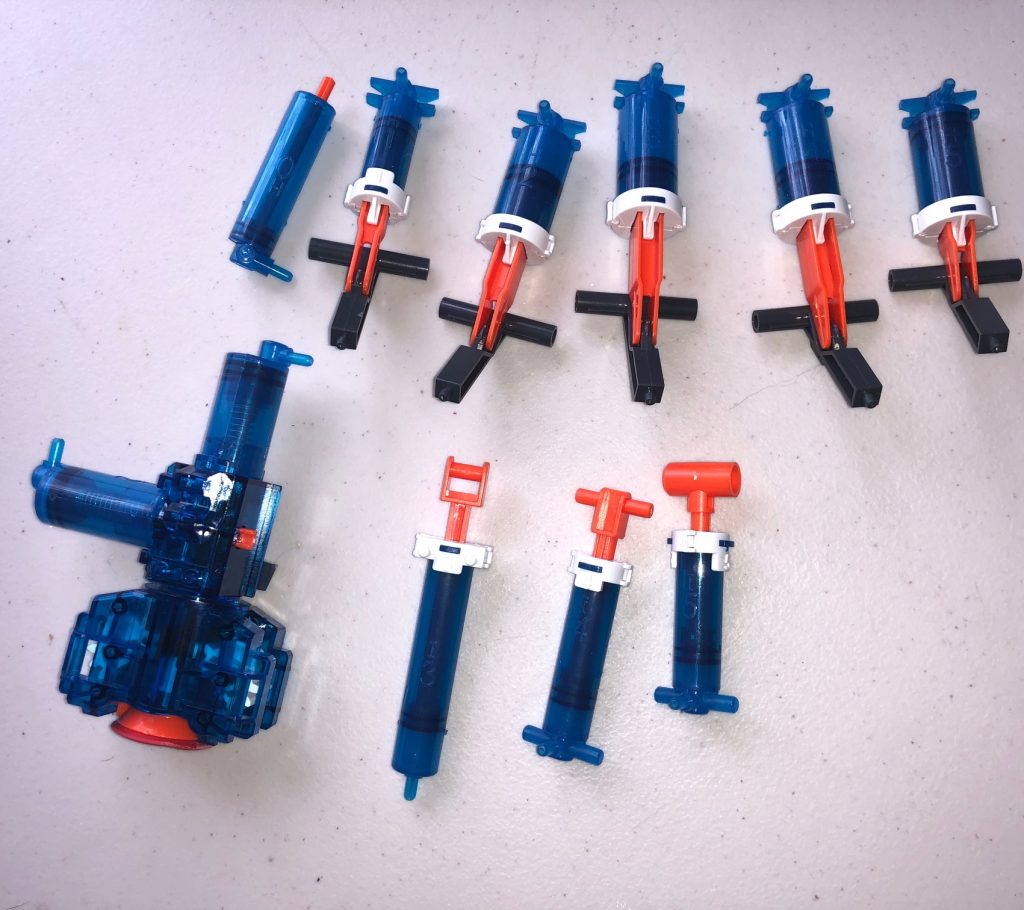
This next part is a little repetitive as we build 11 cylinders. These are all labelled and have subtle differences in shape and construction. Make sure that you have the correct pieces and that the parts click together without gaps cleanly. It’s critical here to avoid over oiling the cylinders. I found this was very much experience from building similar kits rather than following the instructions to the letter. Similarly the reminders to oil the parts can be easily missed if you are not paying attention. The first six cylinders (H) are straight forward. The second set (I cylinders) are trickier, involving ratchets and springs. Here, there are lots of cautions that you can get things the wrong way around, and the diagrams become smaller. Even as an experienced builder of these sorts of things, I found that I had to repeat a few steps to ensure that everything was correct.
At this point, I’d been building about three hours and decided to take a break. The next step involved measuring and cutting and this is not something to be done while concentration is waning!

I picked up the build a while later after finding my tape measure, a marker and some sufficiently sharp scissors. The time gap meant I had cleared away all of the oil and had a fresh surface to work on. You’re given five 60cm lengths of tubing that needs to be cut into six lengths from 8cm to 56cm. Recall the old adage of measure twice, cut once. There is a little allowance so don’t worry if you are out by a millimetre or two, but do take care and label the tubes (as instructed) for your own sanity.
Filling and assembling the hydraulic system was probably the most fiddly part of the build. The kit provides a hook for a cup or jug so that the end of the tubing stays in the water. You start by filling the H cylinder under water, then attach the corresponding numbered tube, push down on the plunger to expel the air from the tube and then pull back to fill everything back up. The tubes are a very tight fit onto the cylinders, which is fine when you are attaching the empty tube to the H cylinder but makes it very difficult to attach the water filled tube to the corresponding I cylinder. Just holding the tubing caused water loss, adding air bubbles to the system and making the assembly slippy! I can see this being a stage at which some people could easily lose patience and I had to reprime the systems a few times.
Once assembled you are instructed to mark the tubing at key places, don’t skip this step as it really helps when routing the hydraulics in the build.
Lever control
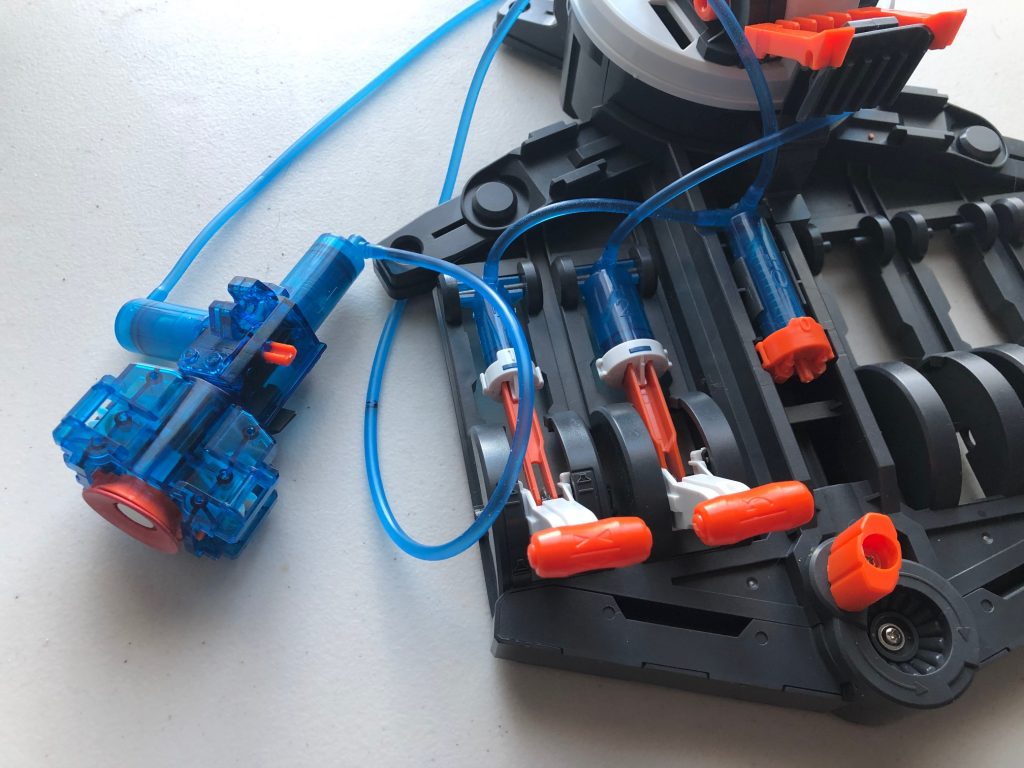
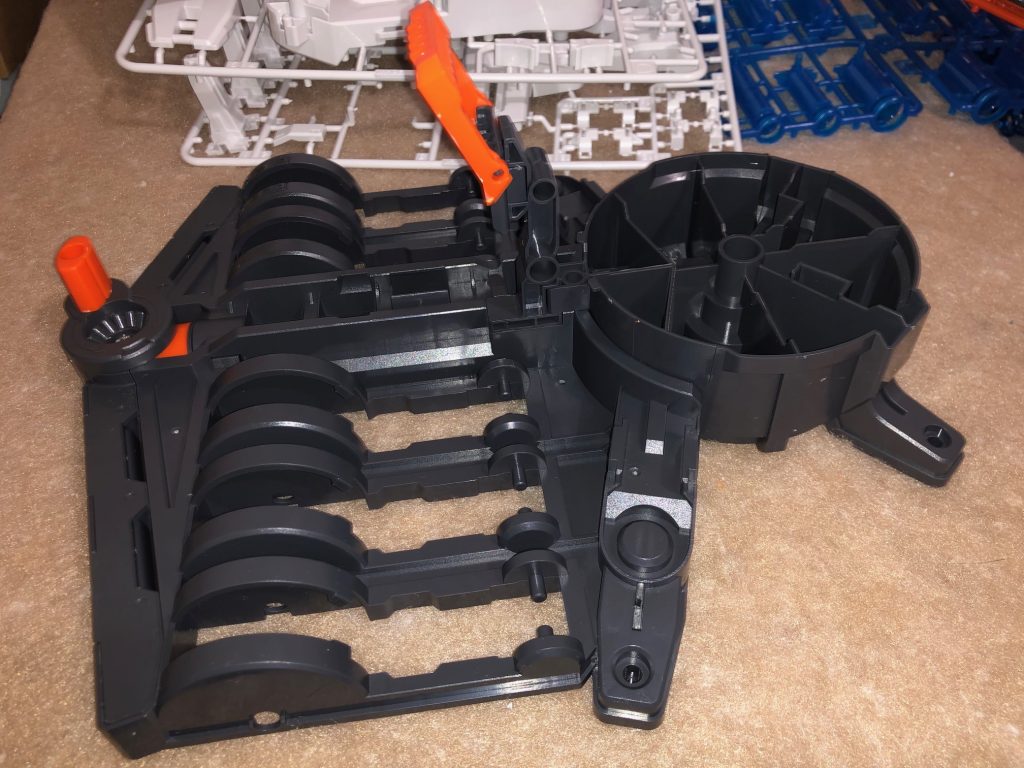
Building the five levers is Lego style simplicity – these parts are identical apart from the top of the lever and have a clear front and back. We then start attaching the levers and hydraulics to the main base. The five levers are pretty similar: add the lever from underneath, feed the H cylinder through from above, insert a sprint into the lever and push the top of the cylinder up until it clicks into place at the lever end and then also at the tube end. The instructions are very clear here. The plastic base is very rigid, so getting the hydraulic assembly to “click into place” requires some force and has the potential for a small pinch injury if you are not careful. The main point here is to ensure that the levers are all the correct way around. Once these parts click into place it is very hard to separate them. I had to do this once as I needed to tighten one of the screws and I needed a very small flat screwdriver to prise the pieces apart.
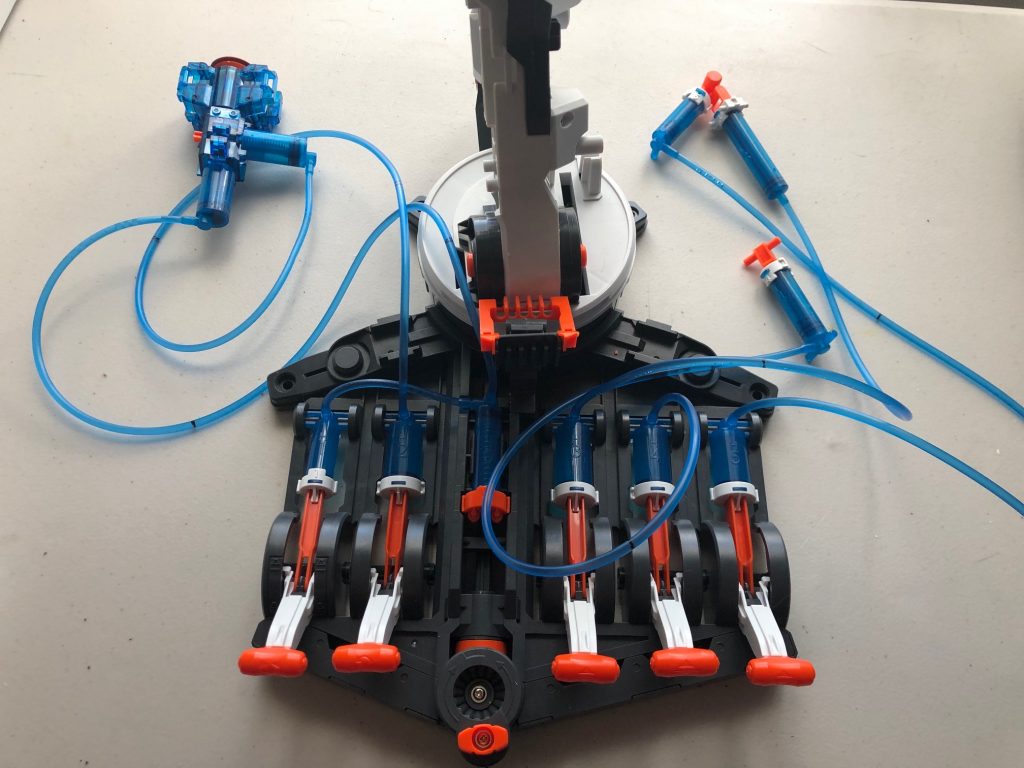
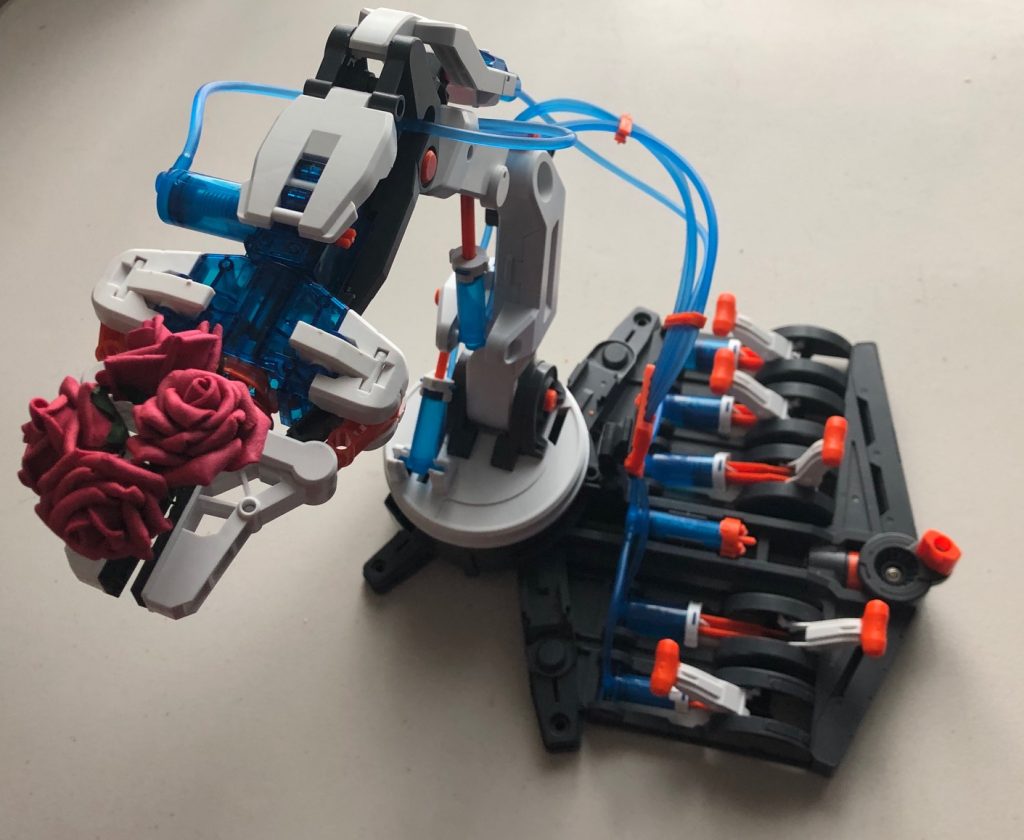
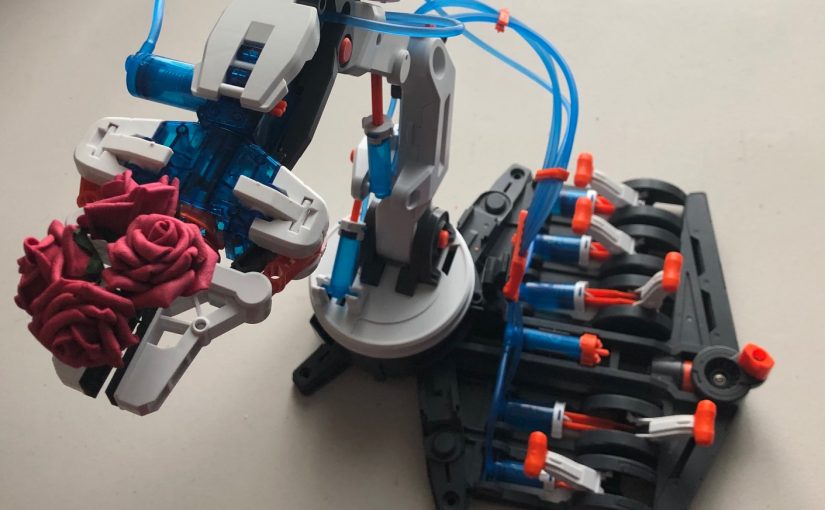
The last part was attaching the “I” cylinder parts of the system to the arm itself and routing the tubes. While the positioning of the cylinders is clear, the exact points to attach them is not always clear as the instructions are in black and white with only the key new parts highlighted. The key here is to take your time before clicking the pieces together – as I’ve mentioned earlier separating parts is tricky – I did have to do this twice because I wasn’t following the instructions. With all the cylinders in place the final stage is to tidy up the tubes using a few clips and the marks made earlier. At this point the final few pages turn to instructions on how to play. Skipping forward a few pages I found the information on adding the gripper assembly around the suction cup. Overall I think this was about a 4 hour build, but I wasn’t timing it.
Playability and thoughts
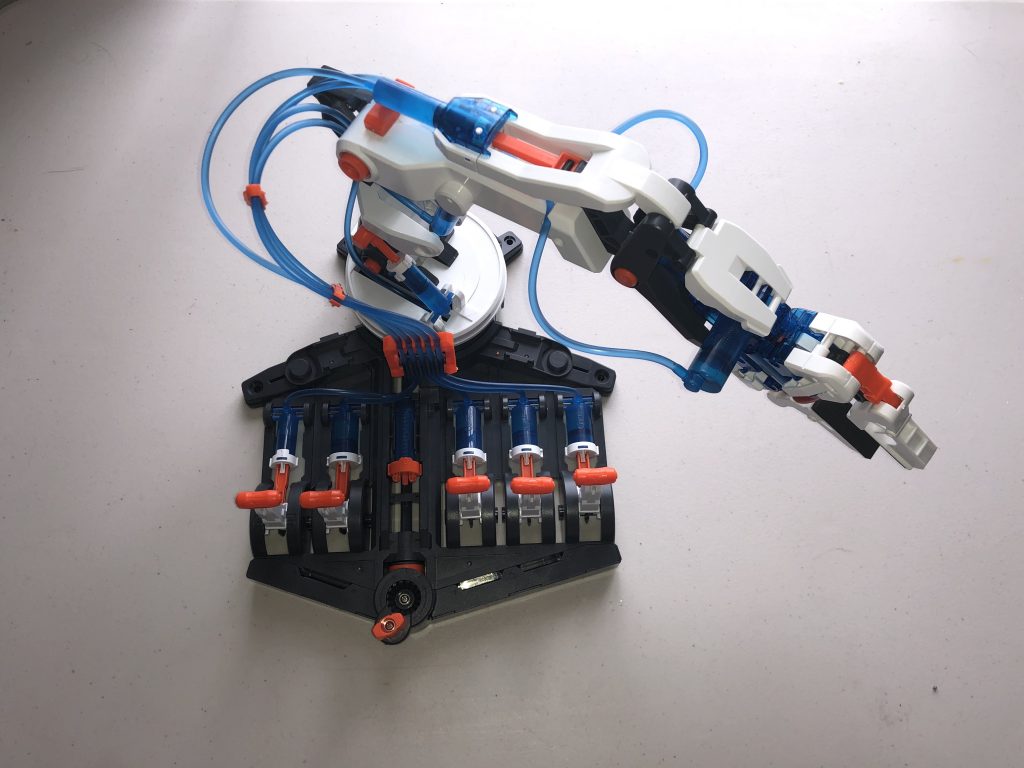
I now had a finished hydraulic robot arm and I was pretty happy with what I’d built. The suction action is weak and can only lift a maximum of 50g. The box has an image of a phone sized piece of plastic being lifted by the suction cup. Don’t expect it to lift your iPhone 😉 The gripper function is more fun and easier to control.
Even though she was below the age suggested, I wanted to see if it engaged her at all. She thought it was cool and immediately wanted to have a go. I very quickly explained what the levers did and asked her if she could make it pick up the smarties on the table. As you can see in the video below she cheated a bit (impatience) but got the principles and control.
She played with it for half an hour and I explained how the water was making the arm move. She could see that working, but her main focus was on the control rather than the why. Probably why it’s aimed at a higher age. She came back to it a few times over the day, which is a good sign it was fun and engaging, and also that it will last for a few years (although she has just asked me to build another robot to control the robot so she doesn’t have to pull the levers 😉 ).
In summary, I think for a child to build this themselves I’d put it at 14+. with supervision then a ten year old could complete it, but each parent will know how capable their child is. I’d avoid buying this for a child you don’t know well enough to determine whether they could build it or not. For playability, the age range could go lower. If you wanted to give this to a child 8+ then that would be fine as long as you build it yourself.
From a STEM toy point of view how does it hold up? While it is a complex build, none of the engineering principles are explained. You build the robot taking on trust the levers and the pistons. There’s no information about hydraulics themselves3 or the effect of air bubbles in the hydraulic system. For me this means that it doesn’t fulfil the aims of a STEM toy – it needs someone who can explain what is going on to be with the child – I prefer toys that allow a child to naturally discover concepts through play.
That said, this kit provides a lot of fun to build for a reasonable price, and works really well. If you have a child who likes to build and is not afraid to ask questions about how and why it works then it’s a great option.
Or if you’re an adult who just likes building fun toys 😀